Friday 28 December 2012

Mosaics

My sister and I used to make mosaics when we were younger, usually as 'charming!' and 'very useful!' gifts for various family members. The fact that we were able to do this at the ages of 10 and 11 is testament to how easy this sort of project can be.

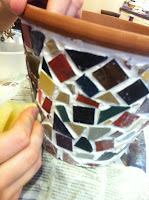
Plant pot with square and cut tiles

Recently, we used a grey day to unearth our old tiles and see what we could do with them with the benefit of a few more years experience. It was a very fun and companionable way to spend a few hours and so I would urge you to try! Below are some brief instructions using an example that my sister and I made, along with some other examples of what you could do for initial projects and links to other sites with good ideas and inspirational projects.


Basic Instructions

What you will need:

Mosaic tiles
Grout
Adhesive
Spatula
An old sponge
Tile cutters and goggles (optional)
Something to decorate!


I imagine most readers will not have this equipment lying around but it is easy and inexpensive to buy. Hardware stores will have tile cutters and grout, which often doubles up as an adhesive. Mosaic tiles can be bought online (see below) unless you happen to have extra lying around from a recent bathroom re-decoration! You can also use alternative materials for 'tiles' such as broken pottery, beads, scrabble pieces...

Buying tiles:

If you do want to buy tiles I did a bit of research. There is a huge range available from basic matt tiles to glittery tiles to pearl tiles to mirror tiles... I have used mostly matt and a few glitter tiles in my projects. I am an ebay lover but if you don't have an account already then http://www.hobby-island.co.uk/ is an example of where you can buy mosaic tiles cheaply.
400 tiles for £3.64 fee P&P from ebay
81 tiles for £2.99 from hobby island
100 mirror tiles for £2.99 from hobby island
Millefiori £2.99 from hobby island
100 broken glass tiles £4.49 from hobby island
Instructions using plant pot example: 


  •  First, prepare your tiles. This step may not be necessary if, for example, you are using mirror tiles and want all of them to be in even square shapes. If you are using broken pottery however, you will have to break the plate into usable sized pieces. To do this you should wrap the plate in newspaper and break it with a hammer outside. If you are using a mixture of whole and cut tiles,you will need to cut the tiles. If you are going to do this it is very important to wear goggles as small pieces of tile may get in your eyes. For this project we used a mixture of whole and cut tiles whose colours we thought would complement the dark green and white of the plant which was to go in the pot.
  • Having prepared your tiles, you can now start mosaic-ing! To do this using adhesive and grout in one product (as we did), use the spatula to cover a small area of the pot with a layer of grout/adhesive and then press the tiles into the grout. Continue n this way until the whole pot is covered. Try to spread the grout evenly and cover the whole of the outside of the pot in grout. 


  • When the whole pot is covered in tiles, leave to set in a cool place for an hour or so / overnight. Then spread grout over the whole pot using a spatula, scraping over the tiles so the spaces between them are filled but little grout is left on the tiles themselves. 
  • Now leave the grout to set for about an hour then while it is still quite soft use an old sponge to clean the tiles. This may take a bit of scraping!
  • This is now your finished pot!
Heatproof placemat

Other project ideas


If mosaic-ing a whole plant pot seems a bit much, a simple place mat may be a good place to start. 
This project is flat and so is slightly easier. For this you need a picture frame which you can fill with grout and apply tiles to as before. 

To add more creativity to your plant pot, you may want to plant it with bulbs yourself. A mosaic decorated pot filled with hyacinth bulbs would make a lovely present for Mum or Granny!

Other projects I might try are a photo frame decorated with mirror tiles or a papemaché letter covered with broken plate tiles. I saw these ideas online:
http://www.allaboutyou.com 


mosaic letter to makePhoto frame made with broken chinamosaic flower pot to make


For the ultimate in mosaic inspiration, I visited a professional's website: http://www.ceramicsandmosaics.co.za/ which has some amazing ideas to try if you really get into these projects. Otherwise they are good for getting inspiration, for example I might try including other shapes into my next pot such as a heart shape like in this pot:
Marylou Newdigate also does ceramics so she makes her own clay shapes to include in her projects which is a bit beyond me but looks great! In this project she also combined a broken plate (the circle) with normal tiles to get a nice effect so I'm going to try that.
Many thanks to Marylou for letting me include her image on my blog.

I hope some of you feel inspired by this post and decide to try your own mosaic!

Helen x


Thursday 13 December 2012

Christmas wrapping

Hi again! Given the lead up to Christmas I'm going to share my tips for creating (what I think are) beautiful wrappings on a budget....
I'm not really a fan of shiny or glittery wrapping at Christmas time and prefer to go for a 'rustic' approach to make my presents stand out!

Christmas Wrapping
Brown paper is inexpensive and looks striking under the tree when partnered with nice ribbon or even coloured wool if you're on a real budget.
Present tags can be made out of the fronts of old Christmas cards or can be made out of nice card as shown below...

Homemade cards and tags
This year I tried making my own Christmas cards for the first time and found it surprisingly easy! I bought some dark green cards and envelopes from Hobbycraft (£2 for 5 but you can buy them cheaper in bulk or online) and decorated them simply with ribbons and buttons. This is all you'll need:

  • Nice coloured cards (pre-bought or made yourself from card if you don't need envelopes)
  • Coloured wool in a contrasting colour to the card
  • Large-eyed needle (for wool) and thread needle
  • Assorted buttons
  • Ribbons
  • PVA glue
  • Scissors
  • A sharp pencil
It would be more arty and authentic to collect your own buttons (or raid your Mum's/Granny's sewing box) but you can also buy a big bag from Hobbycraft for £3 which will last for ages.

To make the cards I cut a length of ribbon and stuck it about 0.5cm from the edge of the card. I then arranged the buttons in a heart shape and used a pencil to draw around the buttons to mark where they should be. It looks nice to use different coloured buttons for this.
I then took the buttons off the card and put them on the table in the same shape. 
I then took the buttons one by one and used a thread needle to pierce the card under the holes in the buttons to make it easier to fit the large needle through. 
I then used coloured wool to sew the buttons onto the card. 
I then used a bit more if the wool to make a small bow and sewed this above the buttons. 


I was very pleased with the result and decided to branch out a bit and try doing a 'Santa hat' version as well although I'm not sure this was as effective! It might be nice for a younger recipient however. For this one I used a pencil to draw a santa hat shape and then used the thread needle to pierce holes around the pencil line. I was then able to sew around the shape using the large-eyed needle and red/white thread. I used a large white button for the pompom at the end of the hat and sewed some buttons at the top as before.


At this point I ran out of cards but was rather in the swing of things so decided to try some tags too. For this I just cut out some pretty card and sewed on buttons and ribbons as before. I then threaded some ribbon or wool through the tags and tied then around the wrapped parcels to make a great finished Christmas gift!


Time and cost effectiveness
Once I got the hang of getting the wool needle through the card these cards were quite quick to do and took about 20 minutes each. The tags were quicker and took about 10 minutes. The cost depends a lot on what bits and bobs you have already but could be the price of a few ribbons and cards! I calculated the cost of my cards to be about 75p each which I think is well worth the time and it was great fun.  

I hope some of you feel inspired to try this. I think I'm going to do this every year!


Helen x

Monday 10 December 2012

Homemade granola

Hello anyone who might be reading this! This is my first blog entry so forgive me if it takes me a while to get going.
I thought that in the lead up to Christmas would share some of my ideas for homemade treats that can make lovely presents. One year I pledged to make EVERYTHING that I put under the tree at Christmas time but the considerable effort involved and the fact that I am no longer a student and actually have to work in the month leading up to Christmas has meant that I have altered my approach a bit. 
Now I just indulge my domestic whims whenever I have a free afternoon or see something particularly delicious in the market. If there are extra jars or sweets left over then I set them aside to give away later on! 

This weekend I just wanted to sit on the sofa in a blanket and watch the whole of Pride and Prejudice back to back. I knew that if that was all I achieved all weekend I would feel quite deflated at the end so I mixed up Colin Firth with some creative cooking!

First, wholesome and delicious homemade granola....

Homemade Granola
The best thing about homemade granola is that you can adjust it to make the perfect blend for you. It therefore seems a bit silly to give a list of ingredients but this should give you a good starting point.

Recipe

250g rolled oats
100g flaked almonds, roughly chopped
75g pistachios, roughly chopped
75g desiccated coconut
100g mixed seeds (pumpkin and sunflower are particularly nice)
100ml honey
2 tbsps sunflower oil

Gently heat the honey and oil in a medium deep pan until it is runny. Mix all the ingredients in so they are evenly covered in the oil/honey mixture.
Spread the mixture on a large baking tray covered in greaseproof paper and bake at 180°C until the oats start to get crunchy. Mix the ingredients throughout so they bake evenly. This should take about 30mins depending on how thickly the mixture is spread.
Take the tray out of the oven and let the granola cool before transferring it into an airtight container.


Variations

This mixture is very nutty and dense which I like. Alternatively you could make a maple and pecan version (substitute honey for maple syrup), a Christmassy cranberry and dark chocolate version, a version with dried apricots.....

Cost effectiveness

This recipe makes quite a large quantity of granola but I find it goes quite quickly! The ingredients are quite pricey but if you buy the nuts in large quantities then it is good value compared posh granola you can buy in the shops and oats and desiccated coconut can be very cheap.

Health benefits

This recipe is not low fat but is full of skin-friendly unsaturated fats from the nuts and seeds and wholesome oats and is much lower in sugar than shop bought cereals. Eat with yogurt for a healthy breakfast or snack that will keep you full for ages.


I'm going to make some more of this nearer Christmas and put some in a pretty tin for my Mum as she loves granola. 

Next time I'll be telling you how to make some delicious red onion chutney and pretty Christmas cards!

Helen x