Tuesday 24 December 2013

The ultimate homemade luxury: homemade florentines

In my view these jewelled beauties are the ultimate homemade luxuries. They are really quite simple to make but look impressive and are delicious with coffee or as an after dinner treat. I made a box this year for my grandparents.

Fruit and nut mixture for the florentines

Ingredients

Chopped blanched almonds and glace cherries
I don't usually like baking things which have lots of ingredients, but most of these things you will already have in the cupboard, and for the fruit and nuts you can mix and match with what you already have. Particularly around Christmas, you will probably find that you have lots of these things already. 

50g butter
125ml double cream
125g sugar
150g candied fruit (a mix of glace cherries and citrus peel is nice, but I threw in some dried cranberries into this mix as I had some in the cupboard. If you like ginger you could add some finely chopped stem ginger)
200g toasted nuts (this could be just flaked almonds, but you can use chopped blanched almonds, pecans, hazlenuts)
50g plain flour
250g chocolate (I usually use about 50% cocoa solids, but see below)

Toasted flaked almonds and hazlenuts


Method

1. First prepare your fruit and nuts. If you are using whole hazlenuts or almonds that still have their skins on, you will first need to remove the skins. For the almonds, blanch them in boiling water, leave them in their for 5 minutes and then they should pop out of their skins. For the hazlenuts, roast them and then rub them vigorously  in a tea towel to remove the skins.

2. If you are using glace cherries, wash off the syrup with hot water and then cut them into quarters. Chop any other fruit or nuts into equivalent size pieces but don't worry too much about this - it creates a nice texture if the bits are different shapes and sizes. 

3. Next heat the butter, sugar and cream until it is homogenous and liquid. 
Step 4

 4. Then stir in the flour and fruit and nuts.

 5. Spoon a full teaspoon of the mixture onto a baking sheet covered with greeseproof paper and press it down slightly into a circle

 6. Fill the sheet with these circles, leaving a good space between them

Step 4

Step 6


 7. Bake the biscuits at 180 degrees for about 10 minutes until they start to turn golden. This will happen quite quickly so keep an eye on them!

Step 7 - baked florentines

 8. Take the baking paper off the trays and lie it flat so that the biscuits set flat. They will be quite flexible still at this stage so be careful.

Step 9
9. Melt the chocolate in a glass or ceramic bowl over a pan of water, or microwave it carefully. You can use one type of chocolate or use a mixture of dark, milk and white chocolate if you want a selection of florentines. I tend to mix dark and milk chocolate together to make one sort of florentine that is slightly bitter but not too dark.

10. When they are cool (about an hour later) turn the biscuits the other way up on a tray or plate and cover them in chocolate.

Step 10


 Package your florentines in a box lined with aluminium foil with a layer of foil in between layers if you are doubling up. Tie the box with a pretty ribbon if you are giving the florentines away.


Finished box of 18 florentines, with 10 left over for eating!


Monday 2 December 2013

Red onion marmalade and berry jam with liquorice

Finished jars, packaged for Christmas
It's my favourite time of year for making homemade things, with Christmas coming up and cosy evenings in being just what the doctor ordered!

I made this red onion marmalade last year and it was delicious, I kept a jar back to eat this year and after keeping it is even better!
The jam was inspired by jam I had at The Modern Pantry in London. I couldn't find a recipe for it but I gave it a go with nice results. I would never eat liquorice flavoured sweets but a hint of it in jam is quite delicious!

Red Onion Marmalade

Ingredients

1.25kg red onions
3 tbsp salt
1kg sugar
500ml apple or cider vinegar
1.5tsps cloves tied in muslin

Method

First chop your onions into fine rings, this is quite important as it will have a big impact on the texture of your marmalade.
Add all the ingredients to a large pan and cook on a low boil for a long time (depending on the heat about an hour and a half) until the onions are translucent, the marmalade is thick and reaches setting point. Don't be tempted to cook it until it is totally stiff, there may be quite a lot of caramel coloured juice still when it reaches setting point. 
If you don't have muslin it is not essential but you will have whole cloves in your preserve. That doesn't really bother me but it would probably be better to use muslin which you can then remove before you decant into jars. 

This preserve is a bit more effort than usual because of all the chopping but I promise it is delicious and improves with keeping. Try it with meat, cheese or on pizza!

Berry and liquorice jam

I had in mind to try this jam after having it on toast at the Modern Pantry in Clerkenwell in London. I didn't find liquorice until this weekend though so when I did I wanted to try it straight away!
It's not really the season for jam making in that there isn't so much fruit around but I had some frozen mixed fruit in the freezer along with some blackberries I picked in August so I used that. 

Liquorice root from the rag market in Birmingham.
Can also be used to make tea!

Ingredients

2 teaspoons chopped liquorice
300g berries
300g sugar
Juice of half a lemon

Makes one large jar (I was doing a test batch!)


Method

Infuse your liquorice root for around 10 minutes in 30ml boiling water until it makes a very strong tea.

Defrost your fruit (in the microwave if you have one) and then add the sugar, lemon juice and liquorice tea. Boil until it reaches setting point (see previous post on strawberry and rhubarb jam). It may take a little longer than usual to set due to the extra liquid added.
Pour into hot jars when still hot, place a wax disc on top and screw the lid on tightly.

 I found that this combination of fruit made a very dark purple jam and I didn't have any problems with scum on the top - perfect!


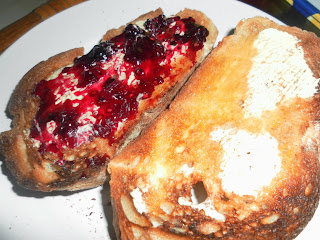
Perfect jam for tea and toast!

  Packaging

 As usual I have tried to make my jars look pretty for presents. This time I used translucent gold paper and wool or twine, with some brown paper labels. I tried out my new alphabet stamps on the onion marmalade label which I think looks nice (obsessed with stamps now).